
Table of contents
Table of Contents
The recipe that made me rethink sandwiches
The first time I made this zucchini breadwich recipe, I wasn’t planning to write it down. I was just trying to clean out the fridge and avoid another store trip. A few zucchini, some eggs, cheese, and a craving for something hand heldthat’s how this started.
I’d been trying to cut back on bread not because I don’t love it (who doesn’t?), but because my mornings were starting to feel sluggish. So I thought, what if zucchini could be the “bread”? Not a soggy, fall-apart mess. But something you could pick up, bite into, and actually feel satisfied.
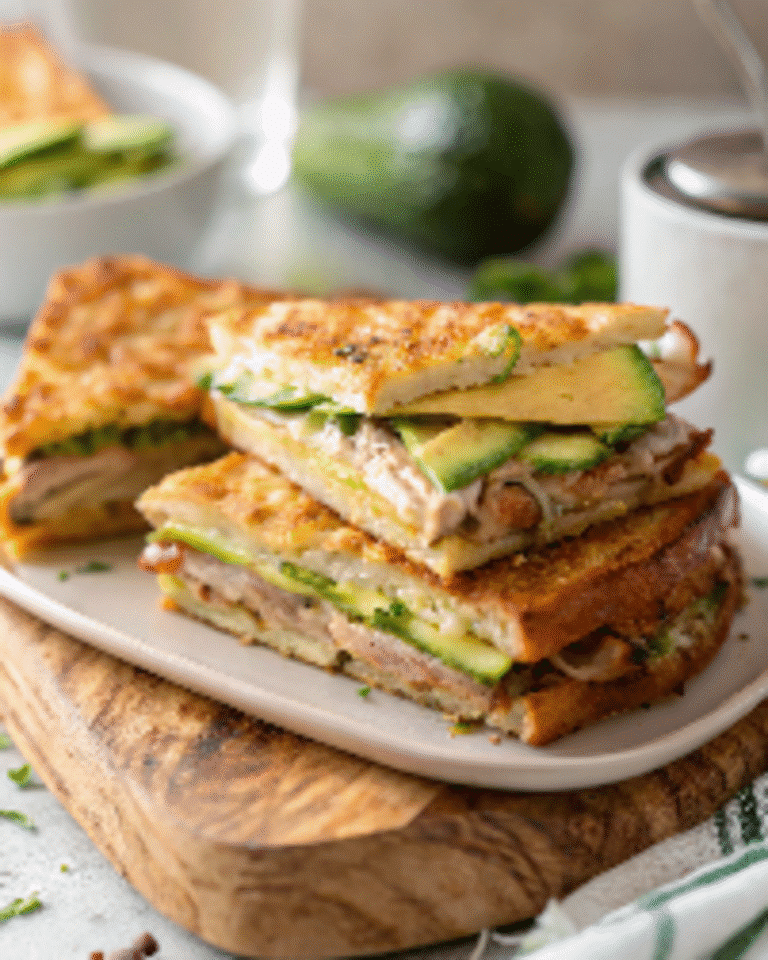
The result? A zucchini breadwich that holds together, tastes incredible, and skips the carbs without skipping the joy. Think of it as the best parts of a sandwich savory fillings, melty cheese, layered flavor without the bread crash. And surprisingly, it doesn’t taste like zucchini either. It’s sturdy, flavorful, and endlessly customizable.
Since that day, I’ve made it for everything from meal prep to casual weekend lunches. I’ve served it warm, packed it for picnics, and even paired it with our Creamy Parmesan Italian Sausage Ditalini Soup for a cozy low carb combo.
If you’re into smart swaps that don’t feel like a compromise, this zucchini breadwich recipe might be your new go to. It’s filling, flexible, and naturally gluten free. You can even make the “bread” slices ahead and refrigerate them for quick lunches all week.
Why zucchini works as the perfect low carb base
Zucchini is one of those vegetables that adapts to just about anything. But for this breadwich recipe, the trick is all in the prep. Grated zucchini is squeezed of excess moisture, mixed with eggs, cheese, and seasoning, then baked into golden, bread like slabs. They hold together like sandwich slices but bring their own subtle flavor and soft-chewy texture.
The key difference between this and just stuffing a zucchini boat? Structure. You can pick this up like a classic sandwich no fork or plate needed. You can keep it classic with turkey and avocado, or go bold with roasted peppers, goat cheese, and pesto. Either way, it’s a major upgrade from basic bread alternatives.
How to Make the Zucchini Breadwich Recipe
Ingredients for the low carb “bread” base
The magic of this zucchini breadwich recipe is that it uses simple ingredients you probably already have. The base becomes sturdy yet tender like flatbread that just happens to be made with veggies.
For the zucchini “bread”:
- 2 medium zucchini (about 2 cups grated)
- 2 large eggs
- 1/3 cup grated Parmesan or mozzarella
- 1/4 teaspoon garlic powder
- 1/4 teaspoon onion powder
- 1/4 teaspoon salt
- 1/8 teaspoon black pepper
Optional for extra crispness:
1 tablespoon almond flour or coconut flour
For the sandwich fillings (your choice):
- Turkey, ham, or grilled chicken
- Sliced avocado or tomato
- Cheddar, Swiss, or goat cheese
- Spinach, arugula, or sprouts
- Dijon, pesto, or mayo for flavor
Step-by-step instructions
1. Preheat & prep:
Set your oven to 425°F (220°C) and line a baking sheet with parchment paper.
2. Grate the zucchini:
Using a box grater, shred your zucchini, then place it in a clean towel and squeeze out as much moisture as possible. This is crucial for structure. You want it dry to the touch.
3. Mix the “dough”:
In a bowl, combine zucchini, eggs, cheese, garlic and onion powder, salt, pepper, and optional almond flour. Mix well to form a thick, slightly wet batter.
4. Shape the “bread”:
Scoop the mixture onto the baking sheet into four rectangles, about 1/4 inch thick. Smooth the edges for even cooking.
5. Bake:
Bake for 15–20 minutes, flip carefully with a spatula, and bake another 5–10 minutes until both sides are golden and slightly crisp.
6. Build your breadwich:
Let the zucchini “bread” cool for 5 minutes, then layer your favorite fillings and serve warm or chilled.
Make-Ahead Tips and Preventing Soggy Zucchini
Can I make the zucchini “bread” ahead of time?
Absolutely. One of the best things about this zucchini breadwich recipe is how well it holds up when made in advance. You can bake the zucchini “bread” slices and store them in an airtight container in the fridge for up to 4 days. When you’re ready to build your sandwich, just pop the slices in a toaster oven or skillet for a quick reheat. They crisp up again beautifully.
If you’re meal prepping for the week, you can double the recipe and stack the cooled slices between parchment paper before refrigerating. This makes it easy to grab-and-go or build lunch in under five minutes.
You can also freeze the baked slices. Lay them flat in a freezer-safe bag and reheat straight from frozen at 350°F for about 10 minutes, flipping halfway through.
Will the zucchini get soggy, and how do I prevent that?
This is the most common concern with any zucchini recipe and here’s how to solve it. Zucchini has a high water content, but in this breadwich recipe, you’re removing nearly all of it before baking. Grate the zucchini, then use a clean towel or cheesecloth to wring out every drop of liquid. You’ll be surprised how much moisture comes out.
If you skip this step, the “bread” will be too soft and won’t hold fillings well. But if you do it right, the result is firm, golden, and easy to pick up no fork required.
To help even more, you can stir in a tablespoon of almond flour or coconut flour to absorb excess moisture, especially if your zucchini is very fresh and juicy. And once baked, let the slices cool on a wire rack. This keeps the bottoms from steaming and getting soggy.
Print
Zucchini Breadwich Recipe – 5-Minute Keto Sandwich Fix
- Total Time: 35 minutes
- Yield: 2 breadwiches (4 slices of bread) 1x
Description
This zucchini breadwich recipe is keto-friendly, gluten-free, and great for make-ahead lunches or quick low-carb dinners.
Ingredients
2 medium zucchini, grated
2 large eggs
1/3 cup shredded Parmesan or mozzarella
1/4 tsp garlic powder
1/4 tsp onion powder
1/4 tsp salt
1/8 tsp black pepper
Optional: 1 tbsp almond or coconut flour
Instructions
1. Preheat oven to 425°F and line a baking sheet with parchment paper.
2. Grate zucchini and squeeze out all excess moisture using a towel.
3. Mix zucchini, eggs, cheese, and seasonings in a bowl.
4. Scoop mixture onto baking sheet in 4 flat rectangles.
5. Bake 15–20 minutes, flip, and bake 5–10 more until golden.
6. Let cool slightly, then assemble your breadwich with fillings of choice.
Notes
Zucchini “bread” can be made ahead and stored in fridge up to 4 days. Toast before assembling for best texture. Can be frozen and reheated.
- Prep Time: 10 minutes
- Cook Time: 25 minutes
- Category: Lunch
- Method: Baking
- Cuisine: American
Nutrition
- Serving Size: 1 sandwich
- Calories: 220
- Sugar: 2g
- Sodium: 320mg
- Fat: 15g
- Saturated Fat: 5g
- Unsaturated Fat: 8g
- Trans Fat: 0g
- Carbohydrates: 5g
- Fiber: 1g
- Protein: 12g
- Cholesterol: 105mg
Keywords: zucchini breadwich recipe, keto sandwich, low-carb lunch, gluten-free sandwich
Conclusion
This zucchini breadwich recipe isn’t just a bread alternative it’s a smart, tasty way to rethink how satisfying a low-carb meal can be. It’s flexible enough for breakfast, lunch, or even a light dinner, and it doesn’t leave you feeling heavy. It’s the kind of recipe that becomes part of your regular rotation because it works for meal prep, picky eaters, or just those days when you want something fresh, easy, and filling.
If you like my recipe check out more on my pinterest
FAQs
Is this recipe keto-friendly and low-carb?
Yes—it’s both keto-friendly and low in carbs, especially when you skip traditional bread and build your sandwich on these veggie-powered slices. Each serving of the zucchini “bread” contains just a few grams of net carbs, depending on the cheese you use. If you’re keeping things ultra low-carb, opt for a high-fat filling like turkey and avocado, or layer on bacon and cheddar with a swipe of sugar-free mustard.
This zucchini breadwich recipe has quickly become a favorite for anyone cutting carbs but still craving that hand-held satisfaction.
Can I use yellow squash instead of zucchini?
You can! Yellow squash works well as a substitute for zucchini in this breadwich recipe. The flavor is nearly identical, and the texture holds up the same way—as long as you wring out the moisture after grating. The only difference is color: your “bread” slices will look more golden from the start.
1 thought on “Zucchini Breadwich Recipe – 5-Minute Keto Sandwich Fix”